Friday, October 13, 2023
CI/CD pipeline in GitHub action and push to Docker image to docker-hub and publish application to vercel
Description: In this topic, I have explained how to setup CI/CD pipeline in GitHub action and push to Docker image to docker-hub and publish application to vercel

Goals: Below are the goals for this document
- Building and publish the docker image to Docker-hub
- Deploy updates to Vercel for every push and pull request
# Fetching the image from the dockerhub
FROM harpalgohilon/reactsample AS development

# Declaring env
ENV NODE_ENV development

# Setting up the work directory
WORKDIR /react-app

# Installing dependencies
COPY ./package.json /react-app
RUN npm install

# Copying all the files in our project
COPY . .

# Starting our application
CMD npm start

Github URL: https://github.com/harpal1990/reactrepo
.gitignore file

Setup Workflow in GitHub Action: To setup the CI/CD we are going to use GitHub Action workflow, which is platform of GitHub to automate the Deployment.
To setup the Github action navigate to Repository --> Actions button

Search for Node.js and configure it

# This is a basic workflow to help you get started with Actions
name: React-Workflow

# Controls when the action will run.
on:
  # Triggers the workflow on push  request events but only for the main branch
  push:
    branches: [master]

# A workflow run is made up of one or more jobs that can run sequentially or in parallel
jobs:
  # This workflow contains multiple jobs
  build_test:
    # The type of runner that the job will run on
    runs-on: ubuntu-latest
    strategy:
      matrix:
        node-version: [18.x]

    # Steps represent a sequence of tasks that will be executed as part of the job
    steps:
      # Checks-out your repository under $GITHUB_WORKSPACE, so your job can access it
      - uses: actions/checkout@v2

      - name: setup node
        uses: actions/setup-node@master
        with:
          node-version: ${{ matrix.node-version }}

      # install applicaion dependencies
      - name: Install dependencies
        run: |
          npm install
      # build and test the apps

  push_to_Docker_Hub:
    # The type of runner that the job will run on
    runs-on: ubuntu-latest
    # build docker image and push to docker hub
    # only if the app build and test successfully
    needs: [build_test]

    steps:
      - name: checkout repo
        uses: actions/checkout@v2

      - name: Set up QEMU
        uses: docker/setup-qemu-action@v1

      - name: Set up Docker Buildx
        uses: docker/setup-buildx-action@v1

      - name: Login to DockerHub
        uses: docker/login-action@v1
        with:
          username: ${{ secrets.DOCKRUHUB_USERNAME }}
          password: ${{ secrets.DOCKERHUB_TOKEN }}

      - name: Build and push
        uses: docker/build-push-action@v2
        with:
          context: ./
          file: ./Dockerfile
          push: true
          tags: ${{ secrets.DOCKRUHUB_USERNAME }}/reactsample:latest

      - name: Run the image in a container
        uses: addnab/docker-run-action@v3
        with:
          image: ${{ secrets.DOCKRUHUB_USERNAME }}/reactsample:latest
          run: |
            echo "runing the docker image"
  push_to_vercel:
    runs-on: ubuntu-latest
    steps:
      - uses: actions/checkout@v2
      - uses: amondnet/vercel-action@v20
        if: github.event_name == 'push' && github.ref == 'refs/heads/main'
        with:
          vercel-token: ${{ secrets.VERCEL_TOKEN }}
          vercel-org-id: ${{ secrets.ORG_ID}}
          vercel-project-id: ${{ secrets.PROJECT_ID}}
          vercel-args: "--prod"
DOCKRUHUB_USERNAME = It is the username for docker image


# npm i -g vercel
Run the vercel command from the project directory where your project is hosted
# vercel

Note: Make sure all the things added under Secretes

So I changed the default message in src/App.js file as follow. So As far as I changed in file and commit it to master branch workflow will run automatically


Saturday, October 7, 2023
Friday, October 6, 2023
Setup ECS with Application Load balancer using custom Docker-hub image
Description: Here I have explained how to upload custom image to ECR [Elastic Container Registry]and use same image to create the ECS [Elastic Container Service] container with Load Balancing. In this example I have created Docker Image in local docker system which I upload to ECR and use same image to setup ECS container
Docker Custom Image: I have setup one react base container docker image with below Dockerfile.dev file.
# Fetching the latest node image on alpine Linux
FROM node:alpine AS development

# Declaring env
ENV NODE_ENV development

# Setting up the work directory
WORKDIR /react-app

# Installing dependencies
COPY ./package.json /react-app
RUN npm install

# Copying all the files in our project
COPY . .

# Starting our application
CMD npm start
Build the docker image using command line as follow with tag reactapp:latest
# docker build -f Dockerfile.dev -t reactapp:latest .
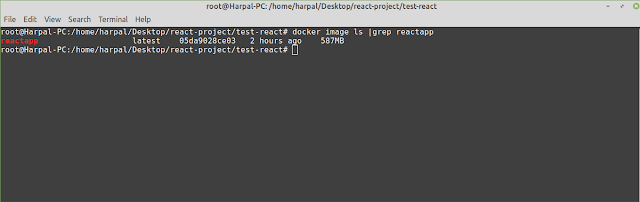
Once image build validate using below command
# docker image ls |grep reactapp
Upload docker image to ECR
Below are the pre-requisite to upload image to ECR
- IAM user
- AWS cli


# docker tag react-latest:latest 997753278599.dkr.ecr.us-east-1.amazonaws.com/reactrepo:latest
# docker push 997753278599.dkr.ecr.us-east-1.amazonaws.com/reactrepo:latest


First Create Target Group from the EC2 service. To create the target group navigate to Load Balancing --> Target Group --> Create Target Group


Use port 3000 for validate


Click on create target
To create the load balancer navigate to EC2 service --> Application Load Balancer --> Create Load Balancer--> Application Load Balancer


After cluster now create the task-definition and filled all the required details. Task definition only required to validate the image working fine or not. So once you validate with task we can remove it.

Give ECR repository details for images and click on create the task definition


You will find the IP address from the task definition --> networking


navigate to services and create the service


Sunday, September 17, 2023
Github integration with Terraform cloud to driven workflow using VCS
Description: Here I have explained, How to integrated GitHub with Terraform cloud to driven the workflow using VCS. When you integrate the GitHub with terraform cloud your terraform project tf files saved in GitHub repository. Whenever you make any changes in GitHub files workflow run automatically.
GitHub Repository:
The first step, we setup blank public repository in GitHub. To create the blank repository navigate GitHub and create blank repository with Readme file

Clone the newly created repository in local folder using git clone command
git clone https://github.com/harpal1990/testrepo-tfcloud.git

After clone the repository I am adding terraform project files in same directory and upload it to repository. So I have uploaded main.tf and install_nginx.sh file as part of my terraform project

Now to push it to repository we need git username and password. So generate git token from the GitHub. To generate GitHub token navigate to user setting in GitHub --> Developer Settings --> Personal access tokens --> Tokens (classic) --> Generate new token


Once you add the additional files and push to origin branch it asked for password/token as follow


Select GiHub as subversion control system and click on next

Once you click on GitHub it will popup for account authorization


First variable add for region as follow

Now add access key and secret key for authorization to AWS as follow

After applying all the variable set run the task from the workspace and confirm apply


Destruction and Deletion: To remove the instance and workspace follow the below steps
- Goto -> Workspace -> Settings -> Destruction and Deletion
- click on Queue Destroy Plan to delete the resources on cloud
- Goto -> Workspac -> Runs -> Click on Confirm & Apply
- Add Comment: Approved for Deletion