Description: Here I have explained how to upload custom image to ECR [Elastic Container Registry]and use same image to create the ECS [Elastic Container Service] container with Load Balancing. In this example I have created Docker Image in local docker system which I upload to ECR and use same image to setup ECS container
Docker Custom Image: I have setup one react base container docker image with below Dockerfile.dev file.
# Fetching the latest node image on alpine Linux
FROM node:alpine AS development

# Declaring env
ENV NODE_ENV development

# Setting up the work directory
WORKDIR /react-app

# Installing dependencies
COPY ./package.json /react-app
RUN npm install

# Copying all the files in our project
COPY . .

# Starting our application
CMD npm start
Build the docker image using command line as follow with tag reactapp:latest
# docker build -f Dockerfile.dev -t reactapp:latest .
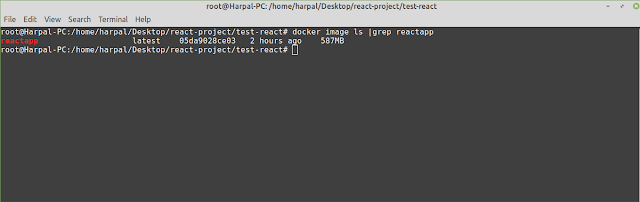
Once image build validate using below command
# docker image ls |grep reactapp
Upload docker image to ECR
Below are the pre-requisite to upload image to ECR
- IAM user
- AWS cli
First I have setup IAM user with my local system using 'aws configure' command and give Access_key, secret_key, location and the output type. After configure AWS cli now create the ECR registry using the command line or we can create from the AWS console
# aws ecr create-repository --repository-name reactrepo --region us-east-1


Once you get the repository on list the open it it shows the list of command line sequence to upload the repository to ECR

First command is used to login withe repository then build repo if not build
Tag the repo image so upload it to repository
# docker tag react-latest:latest 997753278599.dkr.ecr.us-east-1.amazonaws.com/reactrepo:latest
# docker push 997753278599.dkr.ecr.us-east-1.amazonaws.com/reactrepo:latest

# docker tag react-latest:latest 997753278599.dkr.ecr.us-east-1.amazonaws.com/reactrepo:latest
# docker push 997753278599.dkr.ecr.us-east-1.amazonaws.com/reactrepo:latest
Once the image uploaded successfully, you can see the image in ECR

Create Load Balancer for ECS
First Create Target Group from the EC2 service. To create the target group navigate to Load Balancing --> Target Group --> Create Target Group

Once click on create target group fill all the require details as follow

Use port 3000 for validate


Click on create target
To create the load balancer navigate to EC2 service --> Application Load Balancer --> Create Load Balancer--> Application Load Balancer
First Create Target Group from the EC2 service. To create the target group navigate to Load Balancing --> Target Group --> Create Target Group
Use port 3000 for validate
Click on create target
To create the load balancer navigate to EC2 service --> Application Load Balancer --> Create Load Balancer--> Application Load Balancer

Filled all the required details and create load balancer with the target group created on early step
Setup ECS to run the containers
To setup the ECS, navigate to ECS service and first we create the cluster

Give name of the cluster and select farget for server-less

Once filled all the details click on create. It will take some time to create the cluster.
After cluster now create the task-definition and filled all the required details. Task definition only required to validate the image working fine or not. So once you validate with task we can remove it.

After cluster now create the task-definition and filled all the required details. Task definition only required to validate the image working fine or not. So once you validate with task we can remove it.
Give ECR repository details for images and click on create the task definition

Once the Run-task created navigate to cluster and navigate to task --> Run New task

Filled the required details


Make sure in security group port 3000 must be open

Once the task definition created use public IP address and browse in browser using port 3000
You will find the IP address from the task definition --> networking


navigate to services and create the service
You will find the IP address from the task definition --> networking
navigate to services and create the service


Use existing load balancer and the target group and click on create

Once the service created successfully, you can browse the application using Load balancer name with port 3000

Auto-scaling
To setup auto-scaling with existing service, select the service and click on update


You will find multiple tasks in services

No comments:
Post a Comment