Description: Here I have explain, How to build azure pipeline to publish dotnetcore project to Azure container registry for Docker container with Github Repository.
Setup:
- Github Repository with Dotnet core code [https://github.com/harpal1990/corewithdocker.git]
- Azure Container Registry
Procedure:
First I am going to create Dockerfile in Github repository to create and deploy docker container during the pipeline execution.
Create file with name Dockerfile [Name is case sensitive]
First I am going to create Dockerfile in Github repository to create and deploy docker container during the pipeline execution.
Create file with name Dockerfile [Name is case sensitive]
FROM mcr.microsoft.com/dotnet/core/sdk:3.1 AS build-env
WORKDIR /app

# Copy csproj and restore as distinct layers
COPY *.csproj ./
RUN dotnet restore

# Copy everything else and build
COPY . ./
RUN dotnet publish -c Release -o out

# Build runtime image
FROM mcr.microsoft.com/dotnet/core/aspnet:3.1
WORKDIR /app
COPY --from=build-env /app/out .
ENTRYPOINT ["dotnet", "docker-app.dll"]
Screenshot from the Github repository

Create Azure Container Registry: To create Azure container registry navigate to Container Registries and click on Create icon.
Fill all the require details as follow and click on Review + create


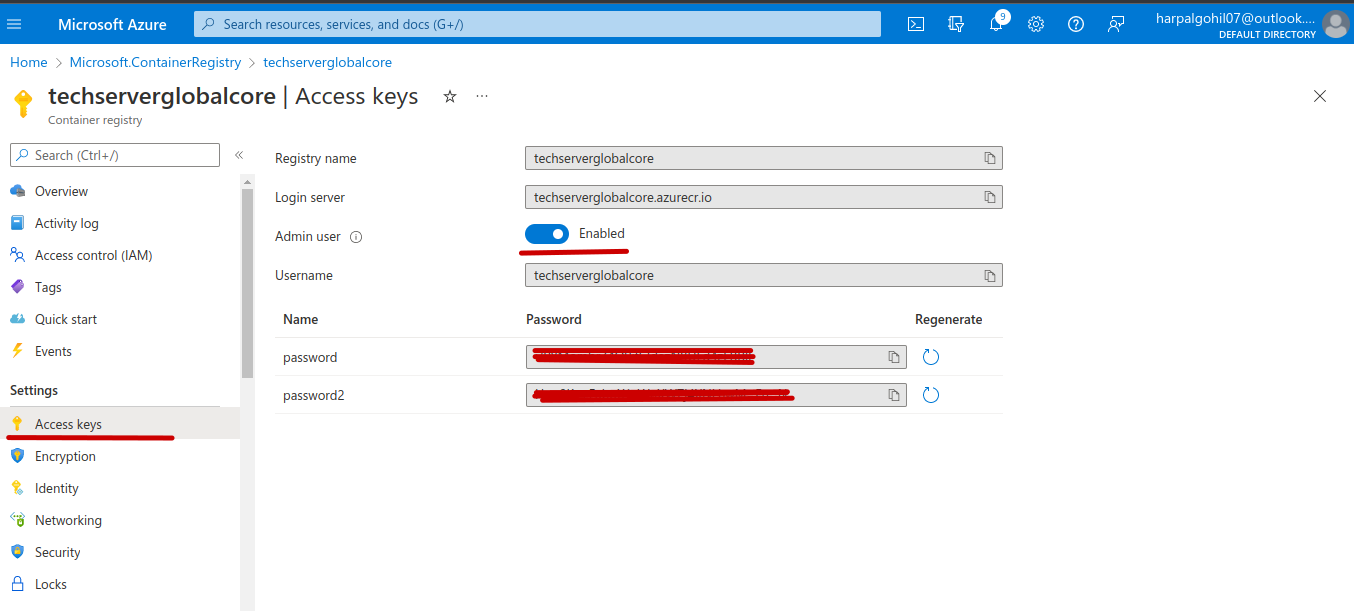
After created container registry successfully, navigate to resource and allow access key for admin access to upload image and use in Azure container.
Setup Build Pipeline: After setup container registry, create build pipeline to take source code from github repository and build image to upload on Azure container registry.
Open Azure Devops console and navigate to Pipeline --> New Pipeline
Open Azure Devops console and navigate to Pipeline --> New Pipeline

After click on Github --> Select the Repository from the Github list, Once you select the repository. By analyse the source code repo, it will shows Docker option for deployment. So here I am going to select
Docker [Build and Push image to Azure Container Registry]
Docker [Build and Push image to Azure Container Registry]

After click on Docket it popup to select Azure subscription, after select you can list the Azure container registry.

After click on valid and configue, it will create azure-pipelines.yml file as follow, where you can validate the configuration. Click on Save and run to trigger the pipeline

After click on Run, if everything is OK then it show successful message as follow

To Verify the pipeline result, Open Azure Container Registry we can find the Instance image as follow:

For test the image, I am going to create one docker container using the above created image in registry
To create docker container, navigate to Container instance in azure and click on create container.
After filled all the details like follow and create it

To create docker container, navigate to Container instance in azure and click on create container.
After filled all the details like follow and create it
Once the container created, browse the public IP in browser for verification

Test the Pipeline: For testing the Azure pipeline, first i am going to stop the container. Then change something on index file as follow and click on commit.

Once you click on commit, Pipeline automatically triggered

Once Job executed successfully, you will get the result as follow

Now I am going to start the container and browse the IP address again, you will get updated content

No comments:
Post a Comment