Description: In this blog, we are going to discuss about the blow point
- Azure Kubernetes Service (AKS)
- AKS features and benefits
- Steps to Create Kubernetes Cluster in Azure
- Connect to the Azure Kubernetes Cluster
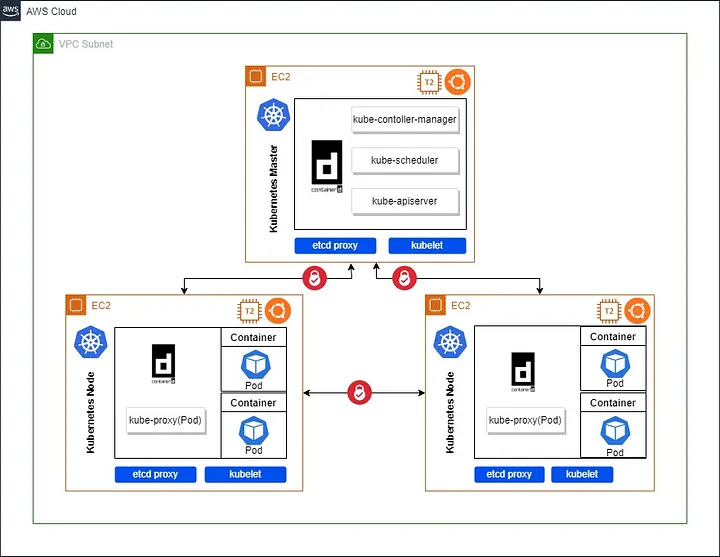
Azure Kubernetes Service (AKS) is a managed Kubernetes service where Azure manages the master node, while end users are responsible for managing the worker nodes.
With AKS, users can deploy, scale, and manage Docker containers and container-based applications across a cluster of container hosts. A key advantage of AKS is its cost-effectiveness—you only pay for the worker nodes in your clusters, not for the master nodes.
Clusters can be created using various methods, including:
- The Azure portal
- The Azure CLI
- Template-driven deployment options, such as Azure Resource Manager templates and Terraform
AKS Features and Benefits
- Managed Kubernetes: AKS is a fully managed Kubernetes service provided by Microsoft Azure. It eliminates the need for manual setup, configuration, and maintenance of Kubernetes clusters. Microsoft takes care of the underlying infrastructure, including control plane management, security patches, and updates, allowing you to focus on deploying and managing your applications.
- Scalability and Elasticity: AKS enables horizontal scaling of applications by automatically adjusting the number of pod replicas based on workload demands. It supports dynamic scaling to handle increased traffic or resource requirements, ensuring optimal performance and resource utilisation.
- Integrated Developer Tools: AKS seamlessly integrates with Azure DevOps and other popular development tools, facilitating continuous integration and continuous deployment (CI/CD) workflows. It provides integrations with Azure Container Registry (ACR) for easy container image storage and deployment.
- High Availability and Reliability: AKS provides built-in high availability features, such as multiple availability zones (in supported regions), cluster auto-repair, and automatic upgrades. These features help ensure that your applications are resilient and available even in the event of infrastructure failures or planned maintenance.
- Security and Compliance: AKS incorporates Azure security features, including Azure Active Directory integration, role-based access control (RBAC), and network security groups. It helps secure your containerised applications and data, ensuring compliance with regulatory requirements.
- Monitoring and Diagnostics: AKS integrates with Azure Monitor, Azure Log Analytics, and other monitoring tools, providing visibility into your cluster’s health, performance, and logs. You can monitor container metrics, view logs, and set up alerts for proactive issue detection and troubleshooting.
- Hybrid and Multi-Cloud Support: AKS enables hybrid and multi-cloud deployments by integrating with Azure Arc. This allows you to manage and govern AKS clusters across multiple environments, including on-premises and other cloud providers.
Steps to create Kubernetes cluster in Azure
There are multiple ways to create the Kubernetes cluster in Azure
- Azure Portal
- Azure CLI
- Azure PowerShell
- Using template-driven deployment options, like Azure Resource Manager templates and Terraform
In this blog, we are going to create using Azure portal.
First step to search for Kubernetes in the Azure portal, click on Kubernetes Services


Update all the required details
- Give the Resource Group name as per your requirement.
- Specify a name to your cluster in the Kubernetes cluster name field.
- Choose a Region in which you want to create your AKS cluster. In the specified region, our master node will be created.
- Based on the region the select the availability zones.
- Select the Kubernetes Version. Here I am choosing the default, i.e., 1.30.6

Select Node Pools configuration instance type

change the size of node size to D2s v3 or as per your requirement and Min- Max node count

Change the network configuration as per requirement

Setup Integration with container registry


Security

Advance

Review + Create

Once it will created you will get the below screen


Click on connect to get instruction to connect the service , in this demo i m going to use azure cli

After configure all the command run the kubernetes command, you will get the results
$ kubectl get nodes

For test purpose just deployed nginx pod

You can list out the node pool